Bremer Bay – A Week of Walls.

Anticipation Grows:

Monday 20th June 2016

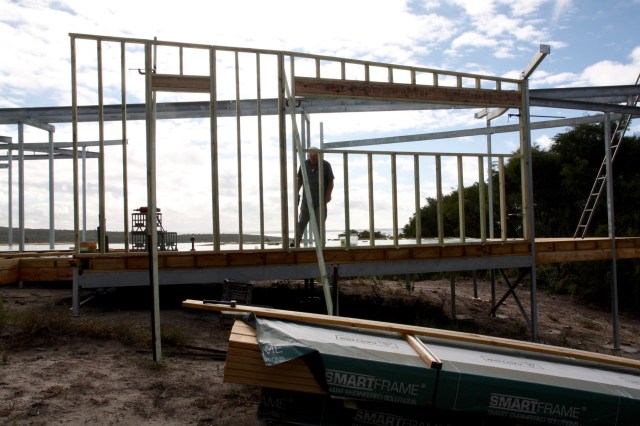
Extra builders are due on-site next  week to put the timber LVL  roof rafters up. So begins an all out effort by Nino and his amateur help, to ensure that there is an outside wall, and a fixing batten in the “C” section of the box gutter’s steel frame to fix these LVL bearers to.

Wednesday 22nd June 2016

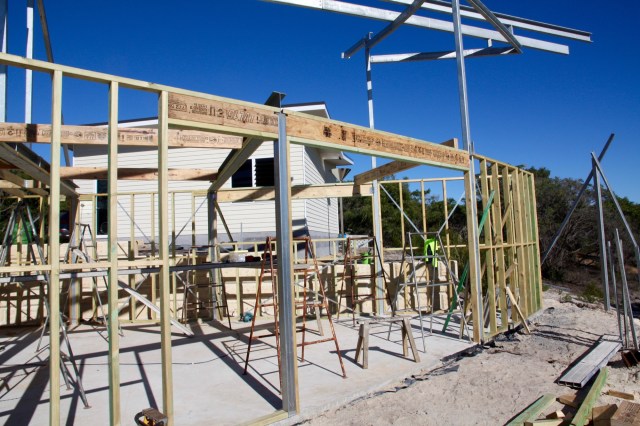
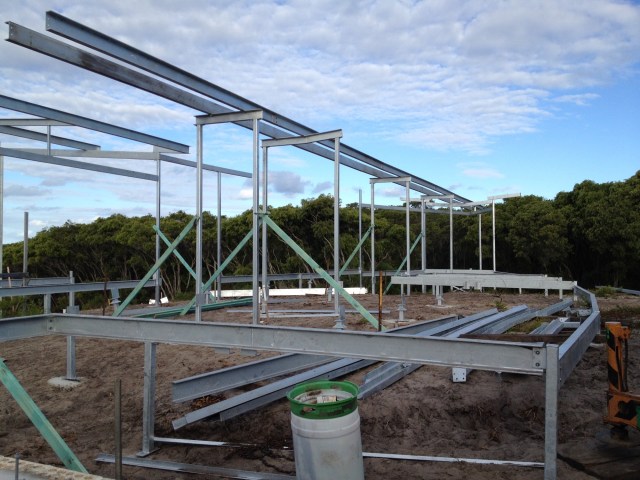
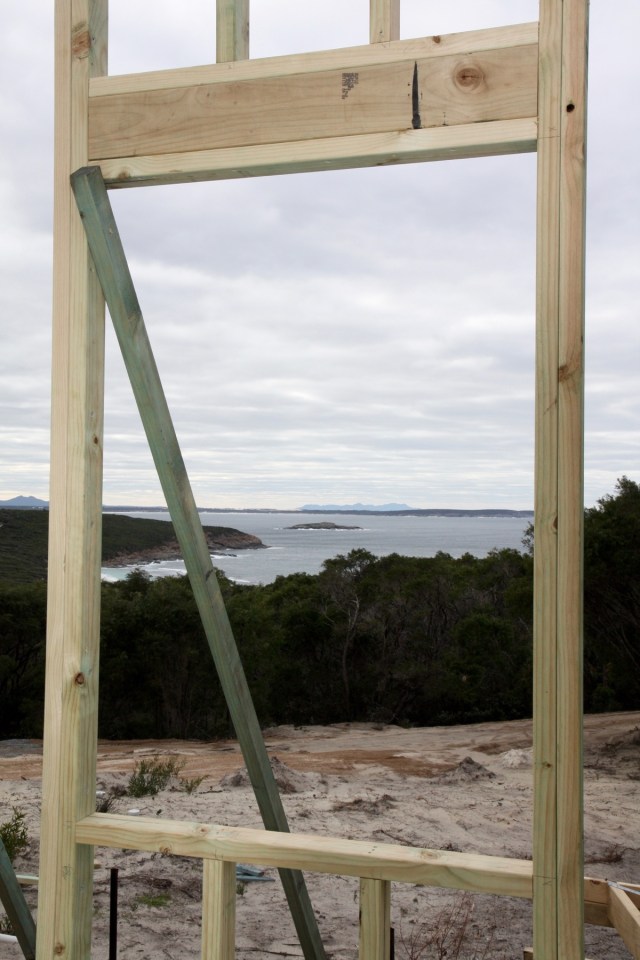
To maintain the 5° pitch of the roof, as the outside walls get further from the “point to point centre line” ( at the mid point of the house the outside walls are 5.5m from the centre) they must naturally get higher. When cutting the wall studs, a 2° angle was required to give this continuous rise, as can be seen below.
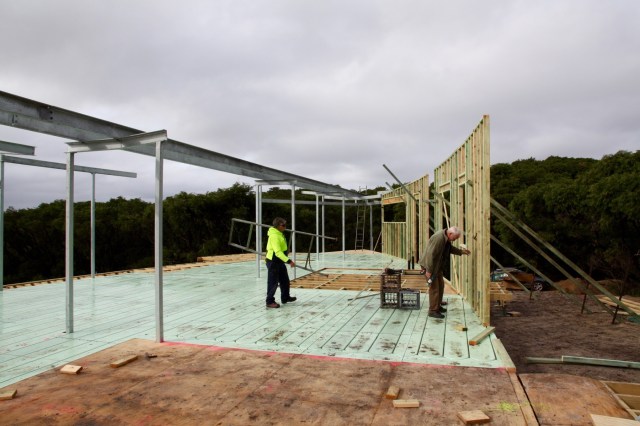
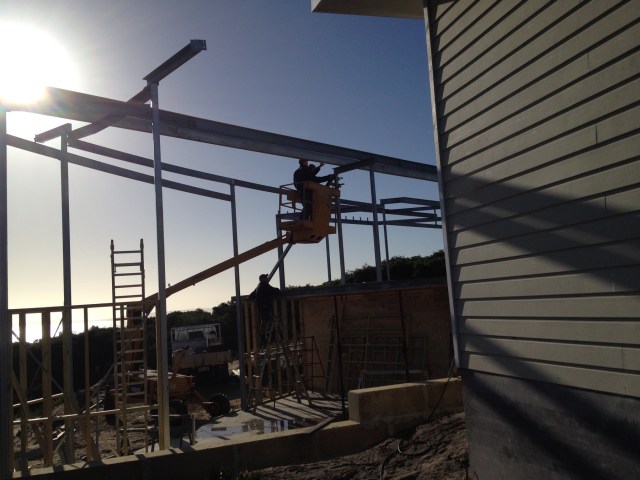
resized 2000pIMG_7127

Nino & “Lynchie”

At each end of the building there are lots of fiddly framing bits to measure, cut, and sometimes the need to chisel around protruding bolts from the steel. Time consuming mainly, but then the whole build requires a lot more time than the normal straight square home.

Not complainin’,…. Just sayin’ like….

Eastern end

The other end, not finished.

Friday 24th June

Yikes.

Nino (I think it is) in disguise, he says “because it is sooo cold!” I think it was to hide his identity as he told the story of the Wild Turkey who went into a bar…

The barman says: ” Hi there,  do you know that we have a whiskey named after you?

The Wild Turkey looks at him and says: “What?  Kevin?

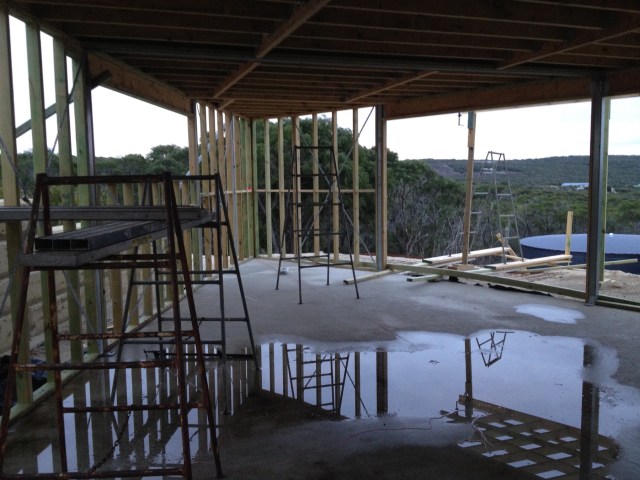
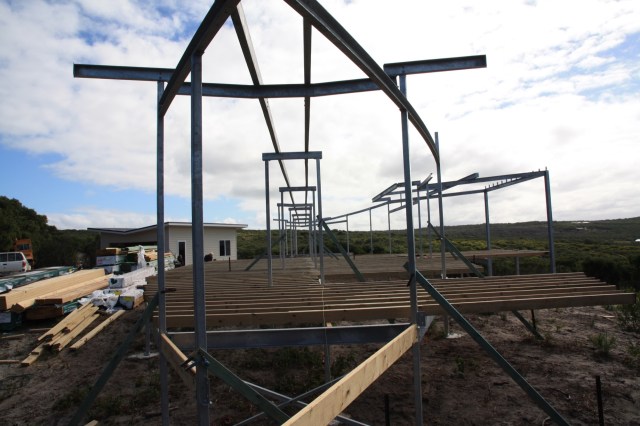
Another week of wall framing has passed with some definition of a few rooms starting to take shape as they are closed in by the wall frames.

resized 2000pIMG_7165

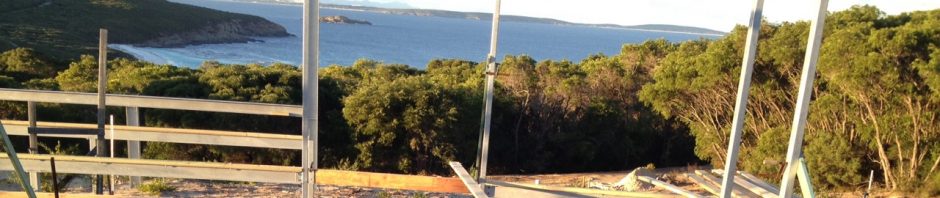
View form the ensuite shower


Where the Larger feature windows are we made the frames as one piece so the large panes of glass are installed as one piece and not broken into two or three smaller windows. This will require packing as can be seen in the picture below.

resized 2000pIMG_7140

Packing required to round the outside profile under this feature window

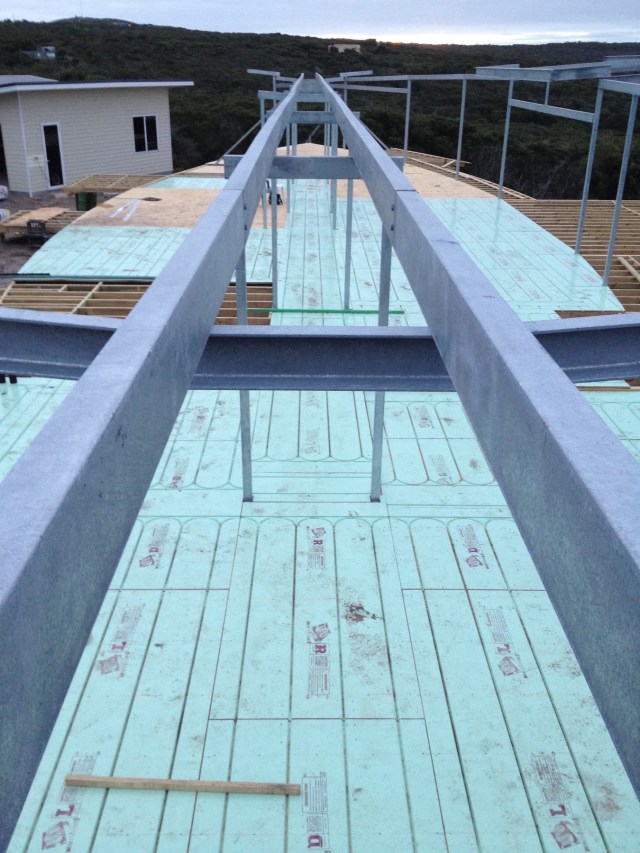
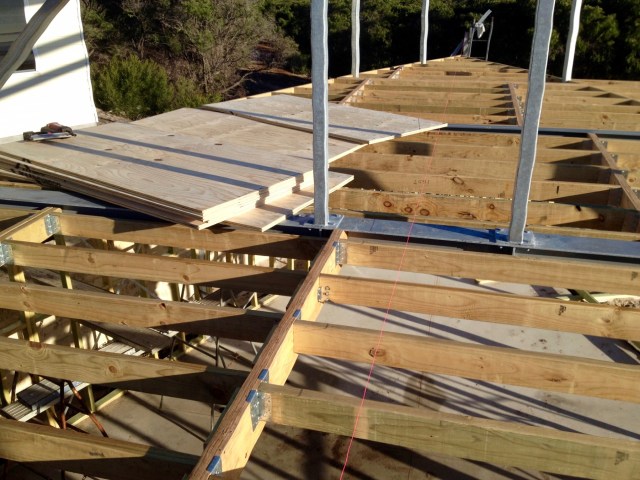
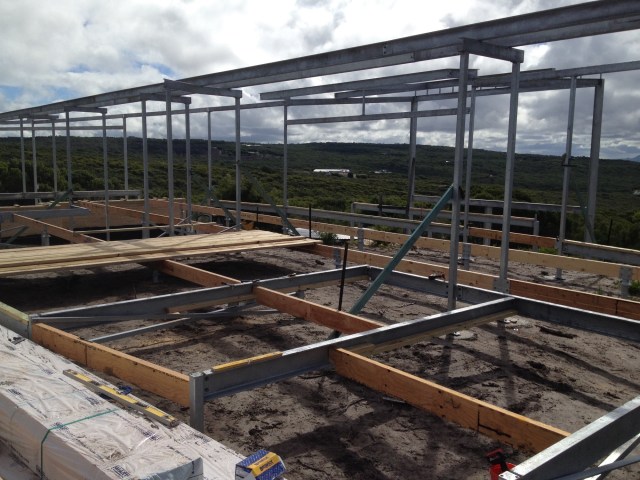
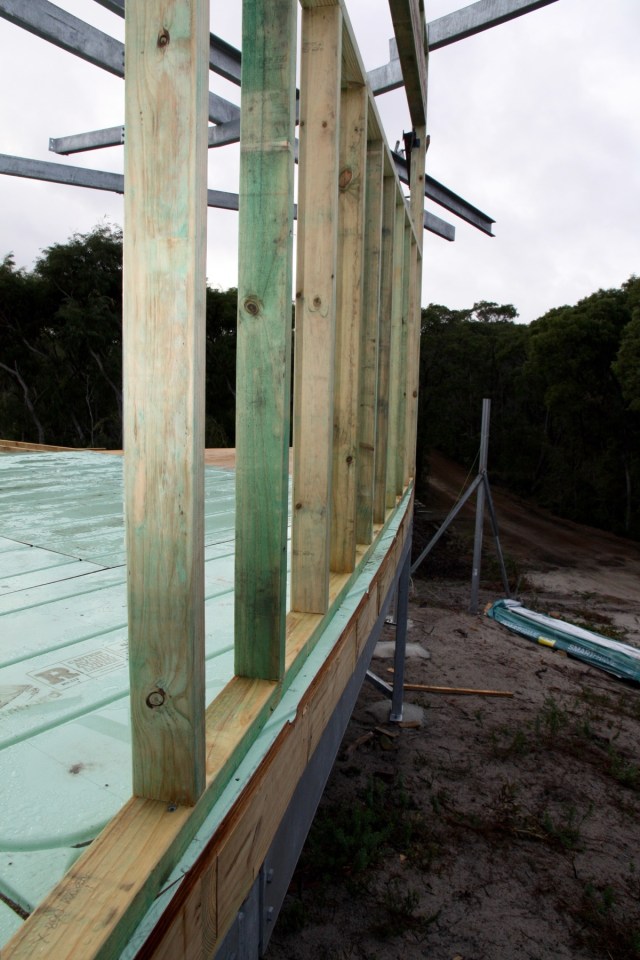
35mm x 90mm timber battens were  bolted to the “C” section of the steel box gutter support, and the opportunity was taken to also bolt on some 35mm x 90mm timber across underneath so as to enable a framework for producing a gradient in the gutter.

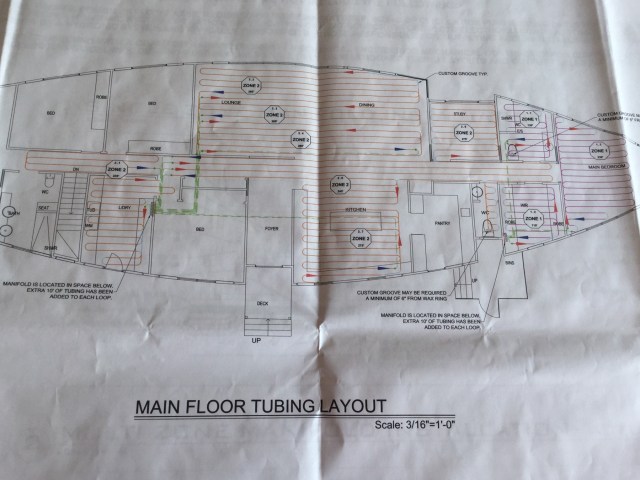
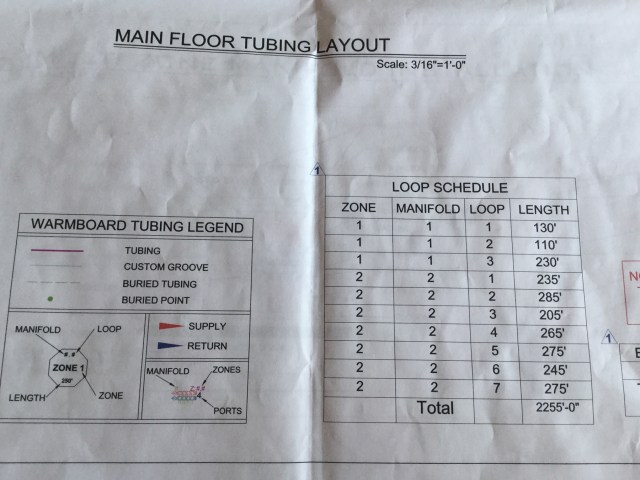
We also need to make our first custom rout in the Warmboard before the ensuite bottom wall plate goes down so as to have room for the router to do it’s business. The pex tubing comes out of the passage into the ensuite and exits back into the passage to continue on to the manifold.We will route it through a doorway, (as drawn on our plans by the Warmboard designers ) but need to do it now as there will not be enough room for the router to work once the wall plate is down. With the router and bit kindly loaned to us by Peter Taylor of  Australian Sun Energy  and the templates which come with the warmboard package, Nino set about discovering how hard or easy this could be.

resized 2000pIMG_1250

Our first custom rout..

All Good. No major dramas, although we found the bit that came with the router was fairly well used and a bit blunt and for some reason it was hard to get enough depth with it. We pulled the bit out of the chuck as far as we dared and used all the depth adjustment available on the router to achieve the right depth for the pex to fit flush into the groove.

Only after, did we discover there was a brand new bit with the templates in the router packaging supplied by Warmboard. Next Time!

Saturday Morning 25th June:
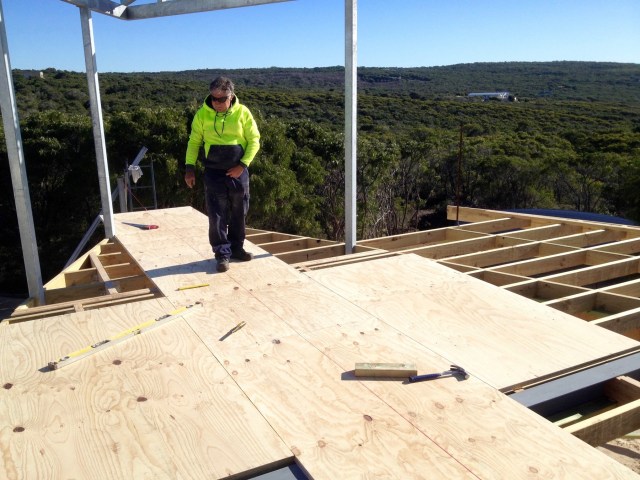
Extra help arrives.

The two extra builders. Jarrod and Toby,  arrived this morning amidst the clearing rain showers. They too have been held up with rain on their previous job, but are all set to make up for lost time.

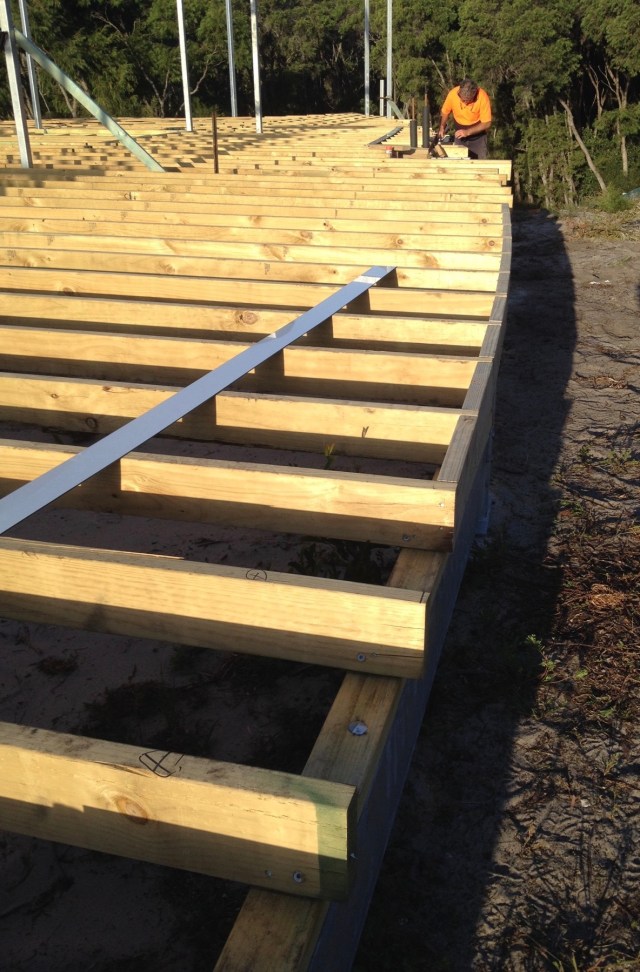
By the afternoon, …. steaming ahead.

resized 2000pIMG_1271

resized 2000pIMG_1272

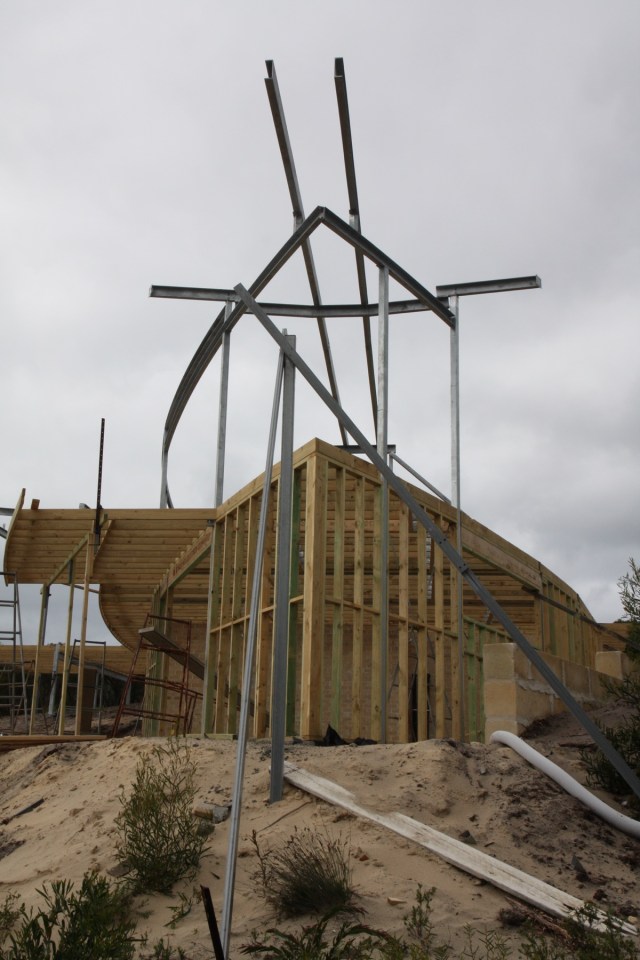
Rafters appear on the skyline

Hopefully a good week of fine weather and plenty of construction to follow, with a third extra “chippie” to arrive on Wednesday I think.


Posted in Bremer Bay, Warmboard, Warmboard Australia, Warmboard S, Warmboard S Bremer Bay | Leave a comment

Bremer Bay – Maybe Some Walls

Wall Framing Begins:

Monday 13th June 2016

I have asked Peter Taylor, our Warmboard supplier, to give us a schematic with all the hardware we were supplied with in situ, as we don’t have a recognized hydronics expert on hand we are flying by the seat of our pants a bit.

Nino measured and marked in the interior walls, which gave us our first glimpse of actual sizes…. for real.

resized 2000pIMG_1204

Rooms being measured and marked in

As we continue to screw the sub-floor and the warmboard down with 75mm bugle headed screws, Nino starts to ponder the task of building the wall framing and following the curve of the building.

So as to follow our curve,  (except for a couple of major windows) we will make the frames to a maximum of 1.6 mtrs which should encompass most window sizes as most are 750mm – 800mm wide. Banks of four windows (of which there are a few) will be made with two windows, each in a frame side by side. The only compromise is the mullion between the two will be wider than planned as the two wall frames will be joined instead of one frame with a larger window opening. These wider frames will have to have various widths of packing applied to the outside so it follows the curve and enables the cladding to flow evenly around the outside.

Our first wall on the main floor:

A frame to fit a large window is the first wall to be built.

The next three are smaller and enable us to more closely follow the curve of the house.

resized 2000pIMG_7124

2nd 3rd and 4th frames go in


The weather is shocking, mainly rain and a lazy wind, so progress is slower than we would like, but nevertheless it is progressing and Nino seems happy now we have decided on how we are to build this thing. Simple fact is we will be building many more smaller frames, meaning more timber, more time but hopefully more satisfaction with a better end product.

As you can see below the smaller frames follow the profile nicely.

resized 2000pIMG_1226

No packing needed

From post to post we have a square steel beam underneath, a timber top-plate bolted to that,  the joists cut to “Timothy’s Template’s” profile  and screwed onto the timber plate, then trimmers cut and nailed between the joists, our warmboard screwed on top and cut accordingly finally the wall frames are put in place.

Moving on slowly, by the end of the week we had a few frames up and the house starts to shape up.

resized 2000pIMG_1220

Wall frames, southern side.

Notice the walls also rise in height until they reach the centre then decrease again. Seems to be about a 2° rise. Another angle!

Nino has found another few builders, starting next week I think, so we may see some action.

Posted in Bremer Bay, Warmboard, Warmboard Australia, Warmboard S, Warmboard S Bremer Bay | Leave a comment

Bremer Bay – Warmboard

Warmboard install continues:

Monday June 6th 2016

Monday, and the weather descends upon us. I imagine it’s probably the worst type of weather for warmboard installation (and the installers).

However the board was uncovered last Thursday (it had been under a weatherproof tarpaulin since arriving about six weeks ago) Nino has arrived and so had the willing helpers, Alan and Ron, so we decided to continue. As you can see from the pictures below it’s not always lovely sunshine for fishing or swimming in Bremer, … or Western Australia.

We will see how the board holds up under these rather soggy and cold conditions.

Already we can see that the normal swelling and bowing is taking place. The wet and slightly swollen tongue and groove of the warmboard made the  mating of the two slightly more difficult, but still manageable. And when routing the smaller groove on the short end (for our plastic tongue to fit) the wet ply dust of the Warmboard would not flow through  the biscuit cutter’s clearing tube, and made it difficult to make a clean channel.

The wet weather has not troubled the 28mm ply board we sourced for our filler board all. I guess it gets wet and drys out evenly top and bottom.  The warmboard panels, by their very build with the  impervious aluminium top layer and ply bottom are going to curve this way naturally when wet. We think the addition of the plastic tongue on the butt ends was a worthwhile exercise, but of course it was not going to stop the ends from curling up when wet. We could not fasten the ends down as they did not end and therefore join on a joist. I think it is something that needs addressing seriously and quickly if the Australian market is to take off. Our joists are 90mm x 45mm timbers, @ 450mm centres, when a 3mm gap is left at the butt end join, that leaves 21mm of joist for each piece of warmboard to be nailed/screwed to, even if they happen to land perfectly half on a joist. I believe most Australian modern timber builds use these joist specs, and it also seems to be a case of “metric v imperial”.

I also think there needs to be a ready supply of 28mm ply board available for any builds using Warmboard “S” here. At the moment it is a rare commodity, pricey and the lead time is at least 4 weeks. If you don’t use a 28mm ply what is the alternative? Different floor heights for heated rooms and others? I don’t know how America overcomes this problem, if indeed it is a problem, but I would like my floor levels to be all the same.

As the board is wet and we couldn’t  screw the ends down anyway, we tacked the board in place along the sides as we went with the nail gun, and I think we will leave the screwing down near the short ends until everything drys out and we see what, if any, other remedial measures are needed to pull the them down.

Some joins have curved up maybe two to three mm, hopefully they will settle when dry, then we can get some pressure/screws applied to an anchor point to hold it.

Finished laying down the board on Friday after 35mm (1½ inches) of rainy weather hit us for most of the week. It is winter after all, and I’m sure it won’t be the last lot of rain we experience.

resized 2000pIMG_1196

Secret Men’s Business:  Covered.

To finish the week I risked life and limb to take this photo of our labours to date. All the little cuts to finish the little gaps left around the edges have been done, the template was employed so as we could cut to shape. We are short 5 sheets of “Filler ply board” (left centre) otherwise … the floor is all down!

resized 2000pIMG_1199

Build overview

Next week: Screwing down the warmboard with millions of screws I think, maybe extra Chippies on board to help with the walls and then roof. Brad, our window expert is also due on site to discuss with Nino the set-out of wall frames and window placements in a circular house. Should be fun.

Posted in Bremer Bay, Warmboard, Warmboard Australia, Warmboard S, Warmboard S Bremer Bay | Leave a comment

Bremer Bay – Warmboard

The Warmboard continues:

Friday June 3rd 2016

With a long weekend looming we carried on installing today until Nino left to drive a couple of hours back to his place in Katanning. Rain forecast for Monday so we will see how everything holds up. Including me.

Also provided with the plans comes the flow and return diagrams, showing all the custom routs required. So we had better make sure each board has been placed in the correct position.

Below is the “Panel Legend” showing the designation of the different types of panel,  the second photo is the “Panel Schedule”showing the number of each type of panel supplied, and the third is a photo of a section of the “Flow and Return Tubing” diagram looks like.

The plumbers had been onsite previously and installed the main flow and returns to the two manifold locations which will control the three zones of heating. We decided to go with 32mm copper pipe to and from our heat source which will be a heat pump.

You can see the locations of the two manifolds in this extended photo below.One is on the right the other is on the left.  Notice Zone two has 7 loops, as I think each loop of pex pipe is only allowed to be 300′.

resized 2000pIMG_0730

Here is the Loop Schedule below

resized 2000pIMG_0731

I went back to the house site on Sunday to view the Warmboard after 10mm of rain and did a video walk of the weeks work.

A video walk through


Posted in Bremer Bay, Warmboard, Warmboard Australia, Warmboard S, Warmboard S Bremer Bay | Leave a comment

Bremer Bay- Subfloor & Warmboard

Subfloor:

Mon June 1 2016

The time has come to start laying down our subfloor. Obviously this will consists of not only the Warmboard but the 28mm construction grade ply  we sourced from the other side of the country to “Fill” the parts of the subfloor of the house which does not have Warmboard installed. As Warmboard ‘S’ is 28mm thick and that thickness is not a common size here in Australia, this “filler board” was quite difficult to find, it is also machined in metric (2400mm x 1200mm) measurements and the warmboard is an imperial (8’x 4′ or 1220mm x 2440mm) sized sheet, so we shall see if that small difference in size will pose any problems as they come together.

Before installation we decided to use a biscuit cutter to groove both butt ends of the ply, (and  Warmboard) apply a tongue to one, so as they would have a tongue and groove joint. The longer sides had already had one in place, factory machined and fitted.

That done, load the sheets onto the building. Slightly easier said than done, they are rather heavy and they had to be lifted head high to end of the top floor here. A couple of friends kindly said they would help, so lets begin.

resized 2000pIMG_1141

The ply comes up top

The first sheets of ply were loaded up onto the joists ready for installation. We started from the western end (above), and with the centre stringline  in place the first board was positioned. Then another, and another, you get the idea. So with a system of sorts in place, we moved at a fair pace as the ply went down.

resized 2000pIMG_1142

Nino & his ply “filler board”

He seems happy at this stage, so we continued to “apply the ply”

We will cut and shape the edges with “Timothy” our Template later, all full sheets go down until we got to the start of the Warmboard which we will tackle tomorrow.

Warmboard Day.

To add  solidity to the Warmboard subfloor it was decided to also rout a groove for a tongue and groove join at the butt end, because as reasoned previously, probably none of the ends would meet on a joist. there are a few different configurations of the Warmboard panel and each panel has its place so as to enable the pex to run it’s proper loops.Warmboard supply a detailed plan of where each board is to be placed, our example is pictured below and we start to the left of the plan with a right (R) and a straight (S). we will continue up that centre line and work off both sides

resized 2000pIMG_0729

The first Warmboard sheet is up on the building and are ready to go in.

Then we are away. Nice straight line, tongue and groove working nicely. A couple of helpers Alan and Ron mad life a lot easier.

Where the Warmboard meets the ply we cut off the Warmboard tongue, grooved a channel and put in our plastic tongue, so as to marry up with the groove in the ply “Filler board”

Lovely evening to finish off the day with the Mid MT Barren ranges on the skyline. They should be paying me to work here!!

resized 2000pAll Photos - 16 of 18

View from the house


Posted in Bremer Bay, Warmboard, Warmboard Australia, Warmboard S, Warmboard S Bremer Bay | Leave a comment

Floor Framing Continues..

Joists and More

As we finish installing the remaining bearers and accompanying joists over the “Secret Men’s Business “room, the curved template arrives from Brad.

resized 2000pIMG_1112

Notice the square beams underneath

resized 2000pIMG_1107

The template at work

It was actually three templates, all about 2m in length which we could tape together to produce a curve as long (or short) as required. We placed the template between each in-ground post, (as these were plotted and placed exactly on the circumference of the curve at set-out) drew a line on the joists, cut and placed the trimmers accordingly, and then trimmed the joists to length. Results are shown above. Nino was ecstatic! So the Template got a name.

resized 2000pIMG_7107

Welcome Timothy!

By coincidence the length of the house is 41m, and the radius if the curve is 40.95m. I kid you not. I’m sure this was not by design. It was the first anyone had mentioned it, or put both measurements side by side to actually notice I suppose. Maybe this is good Fengshui?

All joists are now down on the main house frame and extended out to all the decks.

Then all the trimmers are put in, and the decks have been framed.

The house is beginning to shape up.

resized 2000pIMG_7100

Straight sections that will be modified

Curved Deck

The curved walkway

Posted in Bremer Bay, Warmboard, Warmboard Australia, Warmboard S, Warmboard S Bremer Bay | Leave a comment

Bremer Bay – More Steel Required

 Extra Steel Needed:

resized 2000presized 2000pMagpie nest - 245 of 254

Problem beam

Tuesday May 10 2016:

While constructing the framework for the floor, Nino had been worrying about the lack of steel for support over the top of “The Secret Men’s Business” on the bottom floor.

Also, he pointed out that the large Beam, which crosses from one side to the other here, was starting to sag! No problem for the bearers to reach this first beam from the retaining wall,(in the foreground of above pic.) but the expanse of floor from that beam to the end needed some support. And we needed to stop this problem beam from going even further South.

Solution:  

After contemplating the situation for a while it was decided we call on the local shed builder to weld two supports angled from the top of the two central columns sitting on top of this beam, back down to the outer edges of the beam to act as  braces. These bracing supports will be enclosed within an internal wall and should be sufficient to keep the beam straight, even with the added weight of the floor, the bottom room ceiling, and roof.

We would also add another beam halfway between this one and the end of the house so as to shorten the distance of the bearers had to span.

resized 2000pAll Photos - 1 of 4

Fixing the problem

resized 2000pAll Photos - 1 of 18

One new beam (foreground) & two braces erected

While waiting we decided to build the walls for the undercroft room. With measurements from the centre line to the outside we determined six points at which to change angles taking into account there were windows and doors which were to be straight products

It does look to have a curved exterior, even although the walls are in straight segments.

Brad our glass supplier (and son in law) is present and has said he will cut a few curved templates from aluminium to enable us to define the curve of the house. We will find out the radius of the curve and let him know. Although the CAD drawing should tell us.

resized 2000pAll Photos - 6 of 18

“SMB” room walls framed

We can now continue to install the timber bearers and joists over “The Secret Men’s Business” room.

Posted in Bremer Bay, Warmboard, Warmboard Australia, Warmboard S, Warmboard S Bremer Bay | Leave a comment

Bremer Bay – Joists Going Down

Timber work begins

Nino (builder) arrived last week and oversaw the ground floor “Secret Men’s Business ” concrete pour.

Monday 25 April 2016:

The strapped bundles of bearers were found then cut to length, positioned and bolted onto the steel footplates and the welded cleats of the fabricated gal.steel framework.

resized 2000presized 2000pMagpie nest - 207 of 254

During this process, it was discovered that we (Nino) may have to make provision for seemingly missing posts or cleats that he thought should have been there to support our Timber bearers. His expertise (with added work) overcame the shortfall and so then the timber joists were  unstrapped from their bundles and were cut to length, placed, nailed and screwed onto the bearers.

As the joists went down we were in constant contact with Peter Taylor of  Australian Sun Energy who was supplying our warmboard. We recognised we may need a subfloor the same thickness as the warmboard (28mm) to place where the underfloor heating is not required, so as to keep the subfloor all the same height.

resized 2000presized 2000pMagpie nest - 174 of 254

A long way from..

resized 2000presized 2000pMagpie nest - 169 of 254

.. one end to the other

Dilemma:

It is going to be a challenge to find the footplate for the walls on that left side of the building especially. There is no curved top fabricated beam to take a straightedge measure down from, and the bottom fabricated beams were straight sections,  angled at the joins. If we construct the walls to that profile, I fear the house may not look round, but instead rather chunky and angled.

resized 2000presized 2000pMagpie nest - 143 of 254

Box gutter

With no curve in sight we need to find an easy way to measure, define and mark the curved exterior of the house.

And then see how close we are to being able to sit the walls on the steel supplied!

Posted in Bremer Bay, Warmboard, Warmboard Australia, Warmboard S, Warmboard S Bremer Bay | Leave a comment